
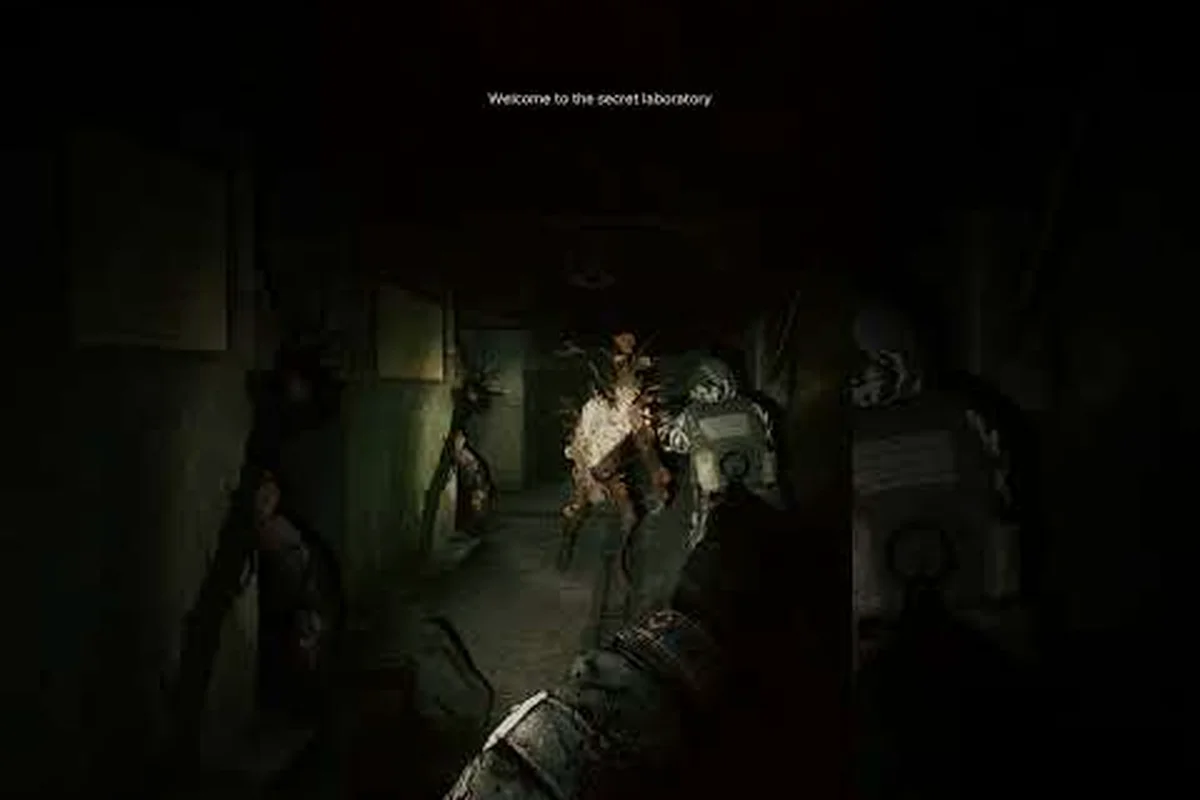
The Active Matter Science Lab map sits at the heart of the Dogorsk quarantine zone, where warped Soviet research corridors collapse into fragments of an American metropolis during the timeline collision event. Walk in unprepared and the lab will strip your kit, stagger your squad, and bleed your timer dry before the extraction chopper even spins up. This walkthrough breaks the entire science lab map into its three floors, its central containment wing, and the safest extract routes so you can pull active matter out cleanly on every run.
Science Lab Map Overview and Location in Dogorsk
The science lab is one of the original Dogorsk raid zones, and it remains the most vertically stacked map in the active matter quarantine zone. The facility is a converted Soviet-era virology institute located on the southern edge of the city, which is why the dogorsk timeline collision layers fragments of a parallel American metropolis on top of the original architecture mid-raid. According to the official game site, the science lab is one of the core maps players learn first when they start the game because it teaches vertical combat, tight-corner engagements, and the difference between passive and aggressive loot routes.
The lab is split into three named floors — Sublevel 1 (Cold Storage), the Ground Floor (Main Hall + Reception), and Level 2 (Containment Wing) — that every operator must memorize before queuing into the active matter quarantine zone, because each tier shifts the loot economy, PvE density, and PvP chokepoint geometry in ways that directly shape the Dogorsk timeline collision rotation.
| Floor | Theme | Primary Loot | Risk Profile |
|---|---|---|---|
| Sublevel 1 (Cold Storage) | Frozen sample vaults, half-flooded corridors | Cryo Cores, medical loot, common ammo | Low PvP, high PvE (frost mutants) |
| Ground Floor (Main Hall + Reception) | Lobby, security office, atrium | Active matter clusters, weapons, attachments | Medium PvP, medium PvE |
| Level 2 (Containment Wing) | Bio-sealed labs, observation galleries, central reactor | Rare active matter nodes, Anomaly Cells, boss spawns | High PvP, high PvE |
A useful cross-reference for the broader Dogorsk map list is the active matter map guide, which catalogs every zone in the city alongside rotation cadence, unlock conditions, and recommended squad loadouts. The science lab fits into that guide as the entry-level quarantine map, sitting alongside the active matter Central Africa map and the active matter American city map on the broader tier list, so operators planning to graduate into the active matter metropolis map can use the lab as a low-risk training ground for the vertical combat and chokepoint discipline that every later Dogorsk rotation demands.
Why the Science Lab Matters for New Operators
The lab is also the map where most new operators first encounter the dogorsk timeline collision, because the containment wing overlaps with a partial map of a parallel American city. The collision spawns extra loot, but it also warps corridors mid-fight, so memorizing the static floor plan is essential before you start chasing the bonus rooms.
Quarantine Zone Layout and Floor-by-Floor Breakdown
The active matter quarantine zone inside the science lab is built around a central elevator shaft. Every floor connects to that shaft, and the surrounding corridors form a rough ring that traps careless squads in crossfires. Treat each ring as its own engagement zone, and the lab becomes a controlled farming route instead of a maze.
Sublevel 1: Cold Storage
Cold storage is the entry floor, and most operators rush through it. Slow down. The frozen sample vaults contain Cryo Cores, which are a high-demand crafting material for any operator running a thermal loadout, and the half-flooded corridors regularly spawn frost mutants that can stagger an entire squad with a single charge.
The recommended cold storage path begins at the east loading bay because the ceiling hatch is the only entry that avoids triggering the patrol route linking the freezer array to the quarantine zone control room; dropping in there saves roughly 40 seconds versus the main stairwell, and it positions your squad north of the three Cryo Core vaults before any frost mutants can re-route toward the central elevator shaft.
-
Drop in through the loading bay on the east side
-
Loot the three sample vaults along the north corridor
-
Cut through the flooded maintenance tunnel to reach the central elevator
-
Avoid the western generator room unless you need Anomaly Cells for a quest, because the corridor bottleneck makes it the most common ambush spot on the floor
Ground Floor: Main Hall and Reception
The main hall is where most firefights break out. The lobby is wide and open, which sounds dangerous, but the wide sightlines also let you spot enemy squads before they can close the gap. The security office on the south side of the lobby is the most consistently profitable room, and the atrium on the north side is where active matter clusters tend to spawn.
Operators running a small or medium backpack setup should focus their ground-floor run on the security office and the atrium only, because trying to loot the entire floor will leave you over-encumbered before you reach the elevator.
Level 2: Containment Wing
Containment is the reason the science lab map is on every operator's rotation list. The bio-sealed labs require a keycard drop from a specific mini-boss, the observation galleries overlook the central reactor, and the central reactor room is the single highest-value loot node in the entire Dogorsk quarantine zone.
The containment wing is also the floor most affected by the dogorsk timeline collision. During a collision event, the eastern labs are replaced by a fragment of a parallel American metropolis map, complete with new corridors, new loot, and new spawns. Operators who know the static lab layout still need to re-learn half the wing every time a collision triggers, which is why the science lab has one of the highest kill totals of any active matter map.
Timeline Collision Events and How They Reshape the Lab
The dogorsk timeline collision is the headline mechanic of the entire Dogorsk map set, and the science lab is the showcase for how it works. According to the official Active Matter news page, a collision event triggers roughly every 20 to 30 minutes during a live raid and lasts for the remainder of that raid.
When a collision fires, parts of the science lab are overlaid with a parallel version of the map pulled from an alternate timeline. The science lab in particular overlaps with fragments of an American metropolis, so corridors get rerouted, walls appear out of nowhere, and the central reactor gains a second observation gallery from the alternate timeline.
Timeline Collision Phases
| Phase | Duration | Visual Cue | Effect on Loot |
|---|---|---|---|
| Warning | 30-45 seconds | Yellow strobe lights, low rumble | None yet |
| Reroute | 2-3 minutes | Corridors shift, new doors appear | Active matter clusters spawn in new rooms |
| Peak Collision | 3-5 minutes | Alternate-timeline rooms fully visible | Rare loot nodes activate, boss spawn chance increases |
| Decay | 1-2 minutes | Map flickers between versions | Containers start collapsing, no new spawns |
The peak phase is when you want to be on Level 2. The alternate-timeline observation gallery is the only place in the lab where you can find a Quantum Anomaly Shard, which is a high-tier crafting material tied to the quantum unstable zone mechanic.
Reading the Collision Indicators
Every floor has at least two visual indicators that a collision is incoming. On Sublevel 1, the flood lights along the maintenance tunnel flicker yellow. On the ground floor, the lobby chandelier sways without any seismic trigger. On Level 2, the observation gallery windows start showing reflections of the alternate timeline, which is your final warning to move toward the central reactor before the reroute begins.
Best Routes and Extraction Points on the Science Lab Map
A clean science lab run is built around three decisions: where to enter, where to spend your peak loot window, and which extract to call. Most squads fail because they spend too long on Cold Storage and arrive at containment during the decay phase with no time to loot the central reactor.
Recommended Solo Route
Solo operators running the active matter science lab map should tighten the loop to two of the three floors, skipping the ground-floor lobby entirely and staying vertical: clear Sublevel 1 sample vaults, ride the central elevator straight to Level 2, and finish the run by farming the bio-sealed labs plus the observation gallery before extracting at the rooftop helipad. This trims roughly 3-4 minutes off the full tour, avoids the open lobby where Dogorsk timeline collision spawns overlap with stray PMCs, and keeps the quarantine zone exposure window under the 8-minute mark where loot-tier rolls start degrading.
-
Spawn into Sublevel 1 through the east loading bay
-
Grab the three sample vaults, skip the generator room
-
Take the central elevator to the ground floor
-
Hit the security office and the atrium, ignore the lobby long fights
-
Take the central elevator to Level 2
-
Farm the bio-sealed labs and the observation gallery
-
Extract through the rooftop helipad
Total expected run time sits at 12-15 minutes once you lock in the two-floor vertical loop, and that buffer matters because the active matter science lab map's Dogorsk timeline collision event cycles on roughly a 6-minute cooldown — so one full cycle can be waited out inside the bio-sealed labs or the observation gallery without burning extract viability. The 8-minute quarantine zone loot-tier degradation threshold mentioned above means you actually want to be moving toward the rooftop helipad by minute 9-10, leaving 2-5 minutes of slack that absorbs one collision spawn wave on the stairwell or elevator shaft before the raid collapse timer expires.
Recommended Squad Route
Squads should split the floors and meet at the central reactor: this division of labor lets pairs clear their assigned wing's sample vaults or security office in parallel, then converge on Level 2 to crack the bio-sealed labs. The central reactor is the natural rendezvous because it funnels every extract path back to the same elevator shaft, so no one has to backtrack across the active matter science lab map. From there one player can babysit the elevator controls while the other three finish looting adjacent wings.
-
Player 1 and 2: Sublevel 1 sample vaults + generator room
-
Player 3 and 4: Ground floor security office + lobby overwatch
-
Full squad: Level 2 bio-sealed labs + central reactor
-
One player holds the central elevator while the other three loot
-
Extract through the rooftop helipad with the rooftop watcher last out
Coordinated four-player runs are the fastest way to clear the active matter science lab map end-to-end, shaving roughly four to six minutes off a typical solo run by parallelizing the sublevel generator room, the ground floor security office, and the Level 2 bio-sealed labs against the central reactor. The trade-off is strict role discipline: the elevator babysitter cannot peel off to loot the adjacent wings, and any player who breaks formation to chase a sample stashes the squad loses the rendezvous window. When executed cleanly, this route still lets the full team extract via the rooftop helipad with a near-complete active matter haul, because every wing's loot path funnels back through the central reactor elevator before the rooftop watcher goes last.
Extraction Points
The active matter science lab map gives operators three distinct extract options, each with its own risk profile that reshapes how a raid plays out in its final minutes: a low-risk, low-reward exit through the West Loading Bay, a contested but fast Central Elevator Exfil gated by a containment mini-boss keycard drop, and an exposed but highly efficient Rooftop Helipad pull that favors squads carrying high-tier loot out of the quarantine zone. Choosing between them means weighing pathing, team strength, and how much of the lab's research report loot you've actually secured, since your extract decision directly determines how aggressively the endgame pushes your squad.
| Extract | Location | Requirements | Best For |
|---|---|---|---|
| West Loading Bay | Sublevel 1, west side | None, but shortest path crosses generator room | Solo runs with low-value loot |
| Central Elevator Exfil | Every floor, mid-map | Elevator Override Keycard drop from containment mini-boss | Squads that loot the full lab |
| Rooftop Helipad | Level 2, north side | None, but exposed to overwatch from the observation gallery | High-value runs that need a quick exit |
The rooftop helipad is the most reliable extract for most operators. The elevator exfil is faster, but it requires a keycard drop that is contested by every other squad in the raid, so it is a coin-flip whether you actually get the card.
Enemies, Mini-Bosses, and Squad Loadout Tips
The active matter science lab map layers two separate enemy ecosystems on top of one another, and a static spawn list will not prepare you for both. The fixed encounter pool scales with each floor's difficulty tier, but once the timeline collision phase triggers, an additional pool of anomaly-type hostiles and re-spawning Containment Overseer adds appear that simply do not exist in the base layout. Memorizing only the standard spawn table — Frost Mutants, Crawlers, AM-Infused soldiers, Bio-tanks — leaves your squad blind to timeline phantoms and the elevated adds that show up on Level 2. Treat the two pools as independent reads, call out phase transitions early, and reposition your long-range operator before the collision window opens.
| Floor | Common Enemies | Mini-Boss | Loot Unlock |
|---|---|---|---|
| Sublevel 1 | Frost Mutants, Crawlers, security drones | Cryo Warden | Cryo Cores, Anomaly Cells |
| Ground Floor | AM-Infused soldiers, security mechs | Lobby Sentinel | Active matter clusters, attachments |
| Level 2 | Bio-tanks, ranged anomalies, timeline phantoms | Containment Overseer | Quantum Anomaly Shards, rare active matter |
The containment overseer is the hardest of the three mini-bosses, and it is the only one that drops a Quantum Anomaly Shard during the peak timeline collision phase. Squads that want the shard should bring at least one operator with a long-range scope, because the boss arena has three separate elevations and a short-range loadout will struggle to find a clean line of sight.
Loadout Recommendations
-
Sublevel 1: Bring a fire-based weapon to counter the frost mutants and keep your movement speed up in the flooded corridors
-
Ground Floor: Bring mid-range armor-piercing rounds to deal with the security mechs in the lobby
-
Level 2: Bring a squad-support medical rig and at least one suppressor, because the containment wing audio cues travel through three floors and will attract every other squad in the raid
A final consideration is the overall map difficulty ranking across Dogorsk, which is worth checking before you commit to a science lab run. The science lab is mid-tier on the difficulty list, but it has one of the highest extract failure rates because of the timeline collision mechanic, so do not assume a quiet map means a safe map.
Frequently Asked Questions
What is the Active Matter Science Lab map and where is it in Dogorsk?
The science lab is a three-floor raid zone on the southern edge of Dogorsk, built inside a converted Soviet virology institute. It is the map where most new operators learn vertical combat, and it sits inside the active matter quarantine zone, which is the largest restricted area in the city.
How does the Dogorsk timeline collision change the science lab map?
During a collision event, parts of Level 2 are overlaid with a fragment of a parallel American metropolis. Corridors get rerouted, new loot rooms open, and a Quantum Anomaly Shard can drop from the central reactor's peak phase. The reroute lasts two to three minutes, the peak phase lasts three to five minutes, and the whole cycle is the most lucrative window in the lab.
Which extraction point is safest on the Active Matter Science Lab map?
The rooftop helipad on Level 2 is the safest extract for most operators because it has a direct line to the exfil chopper with no required keycard. The central elevator exfil is faster but requires a contested Elevator Override Keycard drop, and the west loading bay is fast but routes through the generator room ambush corridor.
Do I need a specific loadout to clear the science lab?
Yes, and it changes per floor. Cold storage wants a fire-based weapon to counter frost mutants, the ground floor wants armor-piercing rounds for the security mechs, and containment wants a squad-support medical rig plus at least one suppressor. Solo operators should also run a medium backpack so they can loot two floors without becoming over-encumbered before the central elevator.
How does the science lab compare to the other Dogorsk maps?
The science lab is mid-tier on the difficulty list, but it has the highest loot ceiling because of the timeline collision mechanic. The metropolis map and the American city map are easier for solo play but have lower peak loot, while the Central Africa map is harder and has a more focused farming loop. Operators who want a balance of safety and reward should prioritize the science lab first.