
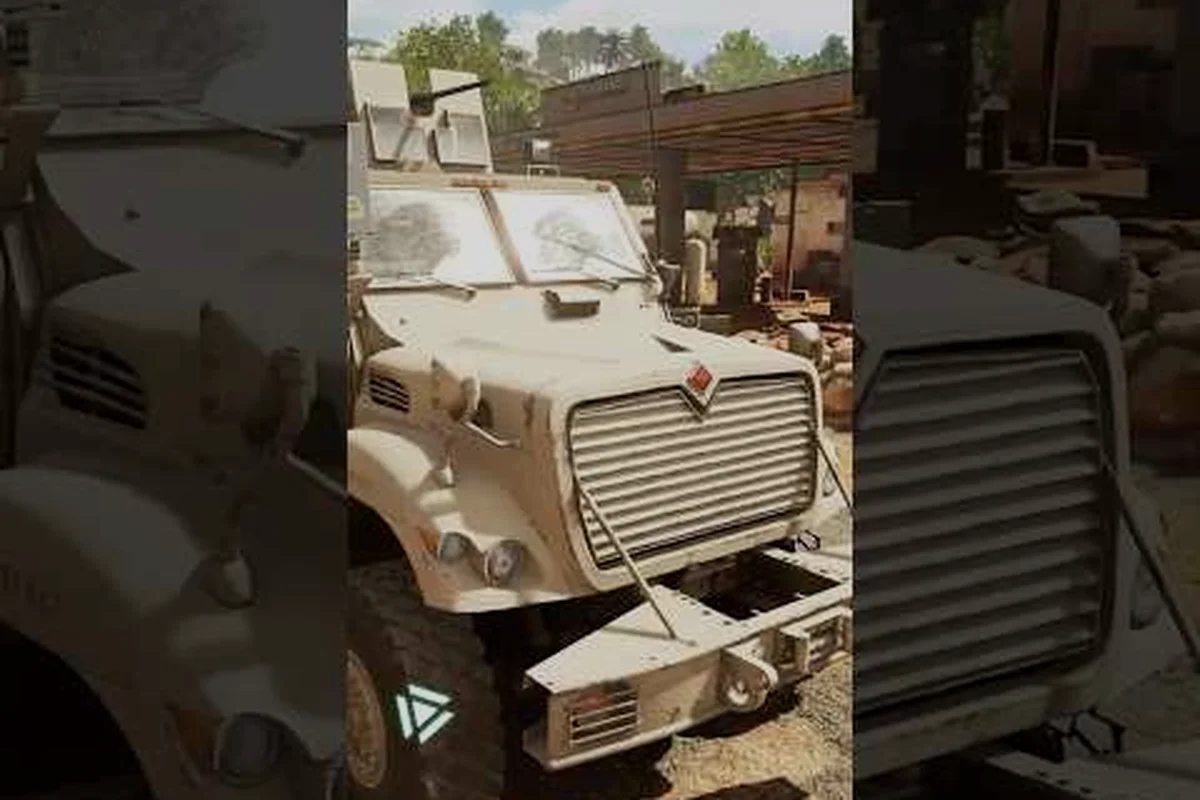
The Active Matter assault quad bike, also called the Bonecrusher ATV, is the fastest way to rotate across the new Downtown raid zones introduced in Operation 250 Shades of Liberty, and pairing it with the right Active Matter loadout for solo or squad play turns it into a serious PvPvE threat. This guide breaks down the ATV's stats, two complete build paths (one lean and one expensive), and the rotation routes that get the most out of every ride.
Bonecrusher ATV Stats and What They Mean In A Raid
The Bonecrusher ATV is a four-wheel assault quad bike added as a deployable military vehicle, not a base building you craft. You bring it into a raid through a loadout slot the same way you would bring a heavy weapon, and it spawns on a designated pad once the raid starts. The reason the vehicle matters so much is the map scale: with the Downtown, Downtown: Unstable Zone, Downtown: Collapse, and Airport zones all live on the same rotation, walking between extraction points is a guaranteed third-party invite.
Here is how the Bonecrusher ATV compares with the other deployable options that show up in the current meta, based on community testing on the official Active Matter website and patch 0.4.0.55 notes.
| Vehicle | Seats | Top Speed (community est.) | Best Use Case | Cost Tier |
|---|---|---|---|---|
| Bonecrusher ATV | 2 (driver + 1) | High | Fast rotation, light harass | Mid |
| Light Scout Buggy | 2 (driver + 1) | Medium | Quiet recon, no armor | Low |
| Armored Transport | 4 (driver + 3) | Low | Heavy squad pushes, loot mule | High |
| Kamikaze Drone | 1 remote | N/A (air) | Single-target demolition | Low |
A few practical notes about those numbers. The Bonecrusher ATV sits in the middle on cost but at the top of the speed class for ground vehicles, which is why solo players and small squads both want it. It only seats two, so pairing it with a friend or with a backup plan for your second slot matters. It also takes small-arms fire reasonably well but will get shredded by a C5 charge or a focused SCAR-H burst, so do not treat it like a tank.
The other stat that is easy to miss is turning radius at speed. The ATV can flick around a corner at full throttle in a way the armored transport simply cannot, which is what makes the rotation routes in the next section possible. If you have driven a quad in any other extraction shooter, the handling will feel familiar; if you have not, plan to do one practice raid in a low-tier zone just to learn the brake and lean behavior before you bring it into a contested Downtown push.
Finally, the vehicle uses a fuel bar that drains while the engine is running but recovers when the engine is off. Idle the ATV at extraction instead of leaving it idling outside a loot room, or you may find yourself walking the last 400 meters with a full inventory and no ride home.
Solo Loadout: Budget Build For The Active Matter Assault Quad Bike
The cheapest realistic way to run the Active Matter assault quad bike as a solo player is to build around the ATV as a rotation tool rather than a combat tool. You are not trying to win a vehicle duel; you are trying to get to the rare loot rooms, vacuum active matter clusters, and get out before the squad teams notice. The active matter budget loadout below is what most solo raiders are running in patch 0.4.0.55, according to community data on the official patch notes and Reddit posts.
| Slot | Budget Pick | Why It Works Solo |
|---|---|---|
| Primary | MP5N (enriched mag) | Cheap to maintain, good at close range if ambushed |
| Secondary | M14 | One-tap potential at mid range, standard ammo |
| Melee | Crowbar | Fast, cheap, and a one-tap finisher on looted PMCs |
| Armor | Light body armor + armor plates | Keeps stamina regen and sprint speed high |
| Backpack | Medium backpack | Enough slots for active matter crystals and 1-2 rare items |
| Vehicle | Bonecrusher ATV | Fast rotation, two seats for emergency buddy pickups |
| Tactical | SOS Beacon | Marks an extraction on the map if you go down |
The reason the MP5N with an enriched standard magazine is the budget primary is the new enriched variant added in update 0.4.0.55, which gives the same frame as the AK-103's enriched mag at a fraction of the price. You give up some single-shot damage, but the close-range DPS is more than enough to peel a solo looter off your ATV while you drive past.
The M14 as a secondary handles the only situation the MP5N cannot: a player camping a doorway 80 meters out. One body shot on a light-armor target is often enough to make them think twice, and the standard 7.62 ammo is dirt cheap to restock at the workshop.
What you are really buying with the budget build is stamina economy. Heavy armor eats sprint stamina, and sprint stamina is what lets you drive the ATV aggressively without having to feather the throttle. With light armor and plates, you can sprint out of a crash, vault a wall, and get back on the bike before the third party finishes their reload.
One thing solo players consistently get wrong is treating the Bonecrusher ATV like a stash. It is not. It holds a tiny trunk and most of that trunk gets used by fuel and ammo. Pull active matter out of the ATV trunk and put it on your character every time you stop, or you will lose the entire run to a single wheel shot and a loot goblin.
For a deeper breakdown of how solo rotations interact with raid timers and the collapse phase, the Quantum Unstable Zone guide covers the underlying mechanic the budget build is built on — specifically how the 18-minute raid clock, the active matter vacuum radius of roughly 12 meters around the Bonecrusher ATV, and the final 4-minute collapse window force solo raiders to commit to two loot rooms max before pivoting to extraction, since the MP5N only has the close-range DPS to peel one ambusher before the mag runs dry.
Squad Loadout: Expensive Build For The Active Matter Assault Quad Bike
Running the Bonecrusher ATV as part of a coordinated squad changes the math completely. The active matter expensive loadout assumes you have a driver and a gunner, plus at least one teammate on foot covering angles the bike cannot see. The goal is no longer just to rotate; it is to push a squad out of a contested rare loot room and hold the angle while the rest of your team extracts.
The active matter loadout for squad that high-end players are using right now leans into the new toys from Operation 250 Shades of Liberty: the SCAR-H, the DP-12, and the TGP-A Suppressor from the official update news. The full expensive build is below.
| Slot | Expensive Pick | Role On The Bike |
|---|---|---|
| Primary (gunner) | DP-12 with slugs | Doorway denial at close range |
| Primary (driver) | SCAR-H with TGP-A Suppressor | Long-range cover fire while driving |
| Secondary | RSh-12 revolver | Last-ditch shotgun-replacement, 12-gauge feel |
| Melee | Pry bar | Faster break on locked loot containers |
| Armor | Heavy body armor + armor plates + helmet | Survive the initial crossfire |
| Backpack | Large backpack | Carry squad overflow + active matter crystals |
| Vehicle | Bonecrusher ATV | Two-seat assault rotation |
| Tactical | Thermal drone + Kamikaze drone | Intel and demolition on call |
The split is intentional. The DP-12 on the gunner seat is the new hotness because the new 250 Shades of Liberty update added it alongside the SCAR-H, and its dual-magazine tube means you can dump eight slugs into a door before anyone in the room has finished their reload animation. Pair that with a TGP-A Suppressor (which also got an increased drop rate in 0.4.0.55) and the SCAR-H on the driver becomes the long stick that keeps enemy heads down while the gunner pushes in.
The RSh-12 is the underrated pick. It is a 12.7mm revolver that hits like a hand cannon, and the reason it earns the secondary slot over a cheaper sidearm is that the gunner can switch to it while leaning out of the ATV without losing stability. If the DP-12 runs dry mid-push, the RSh-12 finishes the fight.
The Pry bar over the Crowbar is a quality-of-life pick, not a damage pick. It opens locked containers faster, which directly translates to more rare loot per raid, which is the entire point of running an expensive build in the first place.
The heavy armor is the part of the build most squads skip, and it is the part that costs them the raid. The Bonecrusher ATV dies in two focused bursts from a coordinated enemy squad, and when it dies, the driver and gunner both take a chunk of splash damage. Heavy armor with plates is the difference between tanking that hit and reviving on the map, because the SOS signal now shows up as a map area in 0.4.0.55.
For a more detailed breakdown of how armor plates and body armor interact with stamina drain, reload speed, and the 0.4.0.55 SOS map signal that triggers when the Bonecrusher ATV gets blown out from under you, the Active Matter armor guide walks through the plate-slot math, the heavy-vs-medium armor breakpoint, and why stacking three plates is what actually keeps the driver and gunner alive long enough to pop a revive beacon instead of extracting with an empty bag.
Raid Routes That Make The Bonecrusher ATV Worth Bringing
Even the best Active Matter loadout for solo or squad play is wasted if your rotation is wrong. The Bonecrusher ATV shines on specific routes through the new 250 Shades of Liberty zones, and there are three that consistently deliver more active matter per minute than any foot route.
Route 1: Downtown Loop (Solo)
The Downtown loop is a fast circle that hits three rare loot markers, the central active matter cluster, and the downtown extraction pad. It works on the Bonecrusher because the loot rooms are spread out and most of the path is straight road. Solo players who learn this loop can clear it in under four minutes, which is the window most squad teams need to gear up and start their own push.
| Waypoint | Land On Bike | Loot Priority | Risk |
|---|---|---|---|
| Downtown North | Yes | Rare weapons, mods | Low, first spawn |
| Central AM cluster | Yes (drive-by) | Active matter crystals | Medium, exposed |
| Downtown South | Dismount | Backpacks, medical | High, often camped |
| Downtown extraction | Park idle | N/A | Variable |
The trick on this route is the central active matter cluster. Do not dismount. Drive through, hit E to vacuum what you can, and keep moving. Most solo players die at the cluster because they park the ATV, get out to grab a specific crystal, and lose line of sight on the road. On the bike, you are already moving to the next waypoint.
Route 2: Unstable Zone Push (Squad)
The Downtown: Unstable Zone push is the squad version of the solo loop, and it is where the Active Matter assault quad bike actually earns its keep. The unstable zone is full of AM-transformed creatures and contested by every other squad that spawned nearby, so the speed advantage of the ATV is the difference between reaching the boss room first and arriving as clean-up crew.
| Phase | Action | Vehicle Status |
|---|---|---|
| Drop in | Two on bike, two on foot 200m behind | Bike idling |
| Engage creatures | Bike stays back, gunner pops threats | Engine on |
| Breach boss room | Bike parks at door, both players dismount | Engine off |
| Loot + extract | On foot, bike left as getaway | Reachable |
The reason the Bonecrusher ATV is parked at the boss room door instead of driven in is that the boss rooms in the unstable zones are too tight for a vehicle. Parking the bike outside means you have a guaranteed exit vehicle after the fight, which is huge when every other squad in the zone is rushing the same sound cue.
Route 3: Airport Run (Mixed)
The Airport raid is the one new zone in 250 Shades of Liberty that has a plane suspended in a gravity anomaly, and the layout is built for vehicles. The Bonecrusher ATV is the right call here because the loot is spread across three terminals and the tarmac, and walking it costs you at least two extra minutes per run.
| Stop | Loot Type | Time On Bike |
|---|---|---|
| Terminal A | Mods, attachments | 30 seconds |
| Plane anomaly | Active matter clusters | 60 seconds |
| Terminal C | Rare weapons | 45 seconds |
| Tarmac extract | N/A | 15 seconds |
The plane anomaly stop is the highest-value one because active matter clusters there are richer than the downtown cluster, and the ATV is the only vehicle fast enough to loot the plane and still make it to Terminal C before another squad rotates in. Plan to use the SOS beacon if the extraction goes loud, because the tarmac is the most exposed extraction point in the current map set.
Tuning The Build: When To Switch From Budget To Expensive
The single most common question players have about the Active Matter assault quad bike is when to graduate from the budget build to the expensive one, and the honest answer is that it depends on three things: how often you die, how often you extract with rare loot, and how much workshop time you have to replace the expensive gear.
A useful decision rule from the community data is below, and it works because each row targets a specific failure mode that the budget loadout masks: an extract success rate under 30% means loot value is too low to justify the workshop drain of an expensive active matter loadout for squad play, a jammed queue means you cannot feed the high-tier active matter Bonecrusher ATV mods fast enough, and under 200 crystals in reserve guarantees downtime the moment a part breaks mid-raid.
| Signal | Stay On Budget Build | Switch To Expensive Build |
|---|---|---|
| Extract success rate | Under 30% | Over 50% |
| Rare loot per run | 0-1 items consistently | 2+ items consistently |
| Workshop queue | Always jammed | Usually clear in under an hour |
| Squad play | Solo only | Duo or trio on a schedule |
| Active matter reserves | Under 200 crystals | Over 500 crystals |
The active matter reserves row is the one most players underestimate. The expensive build chews through the workshop queue, and if you do not have a stable income of active matter crystals to keep that queue fed, you will spend more time crafting than raiding. The budget build is specifically designed to be replicator-cheap so you can run it back-to-back while you build up the reserve that lets you afford the expensive one.
Another angle worth mentioning: the Bonecrusher ATV itself has a fixed cost to bring into a raid regardless of which build you pair it with. That fixed cost is what makes the active matter budget loadout feel so efficient, because you are not spending extra on the vehicle, only on the rest of the kit. Once you switch to the expensive build, the marginal cost of each raid goes up sharply, and that is fine, as long as the value of what you bring out goes up with it.
Frequently Asked Questions
Is the Active Matter assault quad bike worth it for solo players?
Yes, the Bonecrusher ATV is one of the best solo pickups in patch 0.4.0.55 because it turns long Downtown rotations into 90-second loops, and it only requires a two-seat commitment. Pair it with the active matter budget loadout and an SOS beacon and you have a self-sufficient solo kit that can compete for rare loot without burning the workshop queue.
What is the difference between the Bonecrusher ATV and the armored transport?
The Bonecrusher ATV seats two and is built for speed and turning, while the armored transport seats four and is built for tanking damage. The armored transport wins in a straight brawl, but the Bonecrusher wins in any rotation longer than 200 meters, which is most of the new 250 Shades of Liberty map set. Most squads run one of each and use them for different phases of the raid.
Can I run the active matter loadout for squad without a Bonecrusher ATV?
Yes, but you will lose most of the rotation speed advantage that the squad build is designed around. The DP-12 and SCAR-H combination works fine on foot, but the moment an enemy squad grabs their own Bonecrusher, your team will struggle to contest the same rare loot rooms. Treat the ATV as a multiplier on the squad build rather than a requirement.
How do I unlock the TGP-A Suppressor for the SCAR-H?
The TGP-A Suppressor is a world drop that can appear on any weapon, and the chance to find it was increased in the 0.4.0.55 patch per the official notes. The fastest way to farm it is to run the Downtown solo loop on the Bonecrusher ATV and check every weapon spawn, because suppressors tend to land on the same room spawns as the SCAR-H itself.
Does the Active Matter assault quad bike use active matter as fuel?
No, the Bonecrusher ATV uses a standard fuel bar that refills for free at the workshop. Active matter is only consumed when you craft the vehicle into a raid loadout slot, not while you drive it. That separation is what makes the vehicle viable as a daily driver, because you can run it on every raid without touching your active matter reserves.